The Easiest Way to Make a Tulle Wreath
Why Tulle Wreaths are Versatile
Tulle wreaths are a fun, easy and inexpensive way to create a perfect decoration for any holiday or party. They can bring you that much needed pop of color without breaking the bank as well. You can hang them in your front door or anywhere on an open wall that could use a little splash of seasonal beauty. The tulle can also be cut to any desired length and look gorgeous in any arrangement. There is no need to spend a lot of money on a store bough tulle wreath when you can just make one yourself and design it your way.
This tutorial is a step-by-step guide to show you how easy it is to create your work of art. I even had a little helper this time around, which made is so much more fun!
Let’s get started!
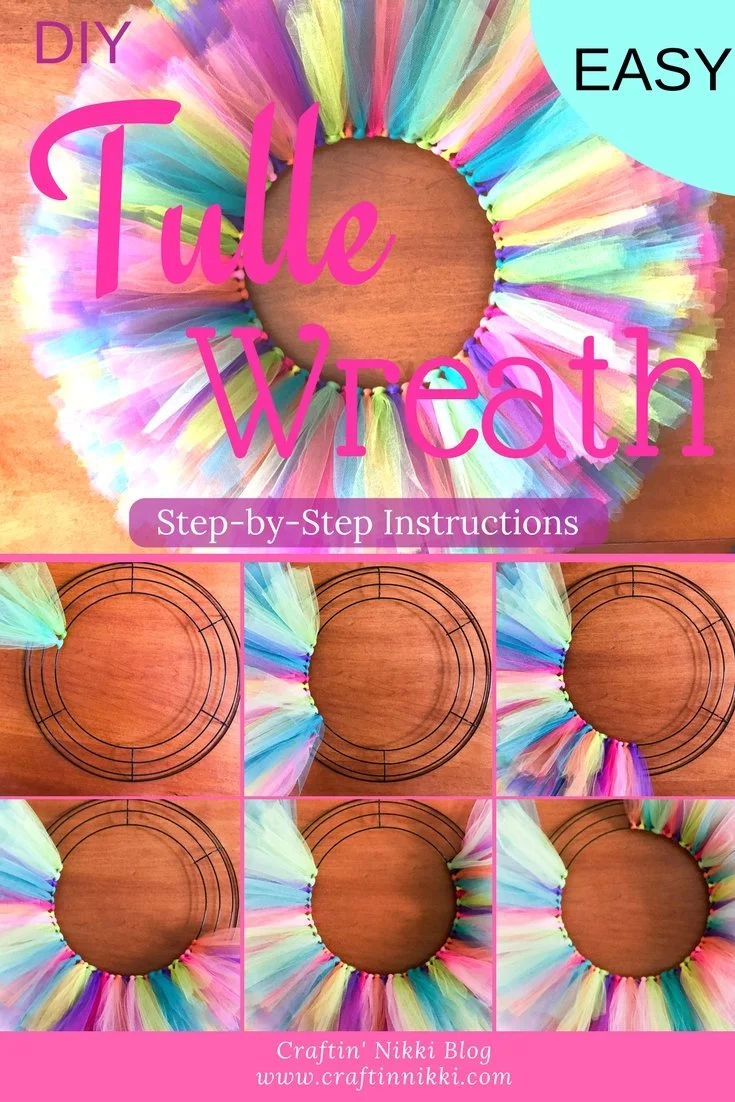
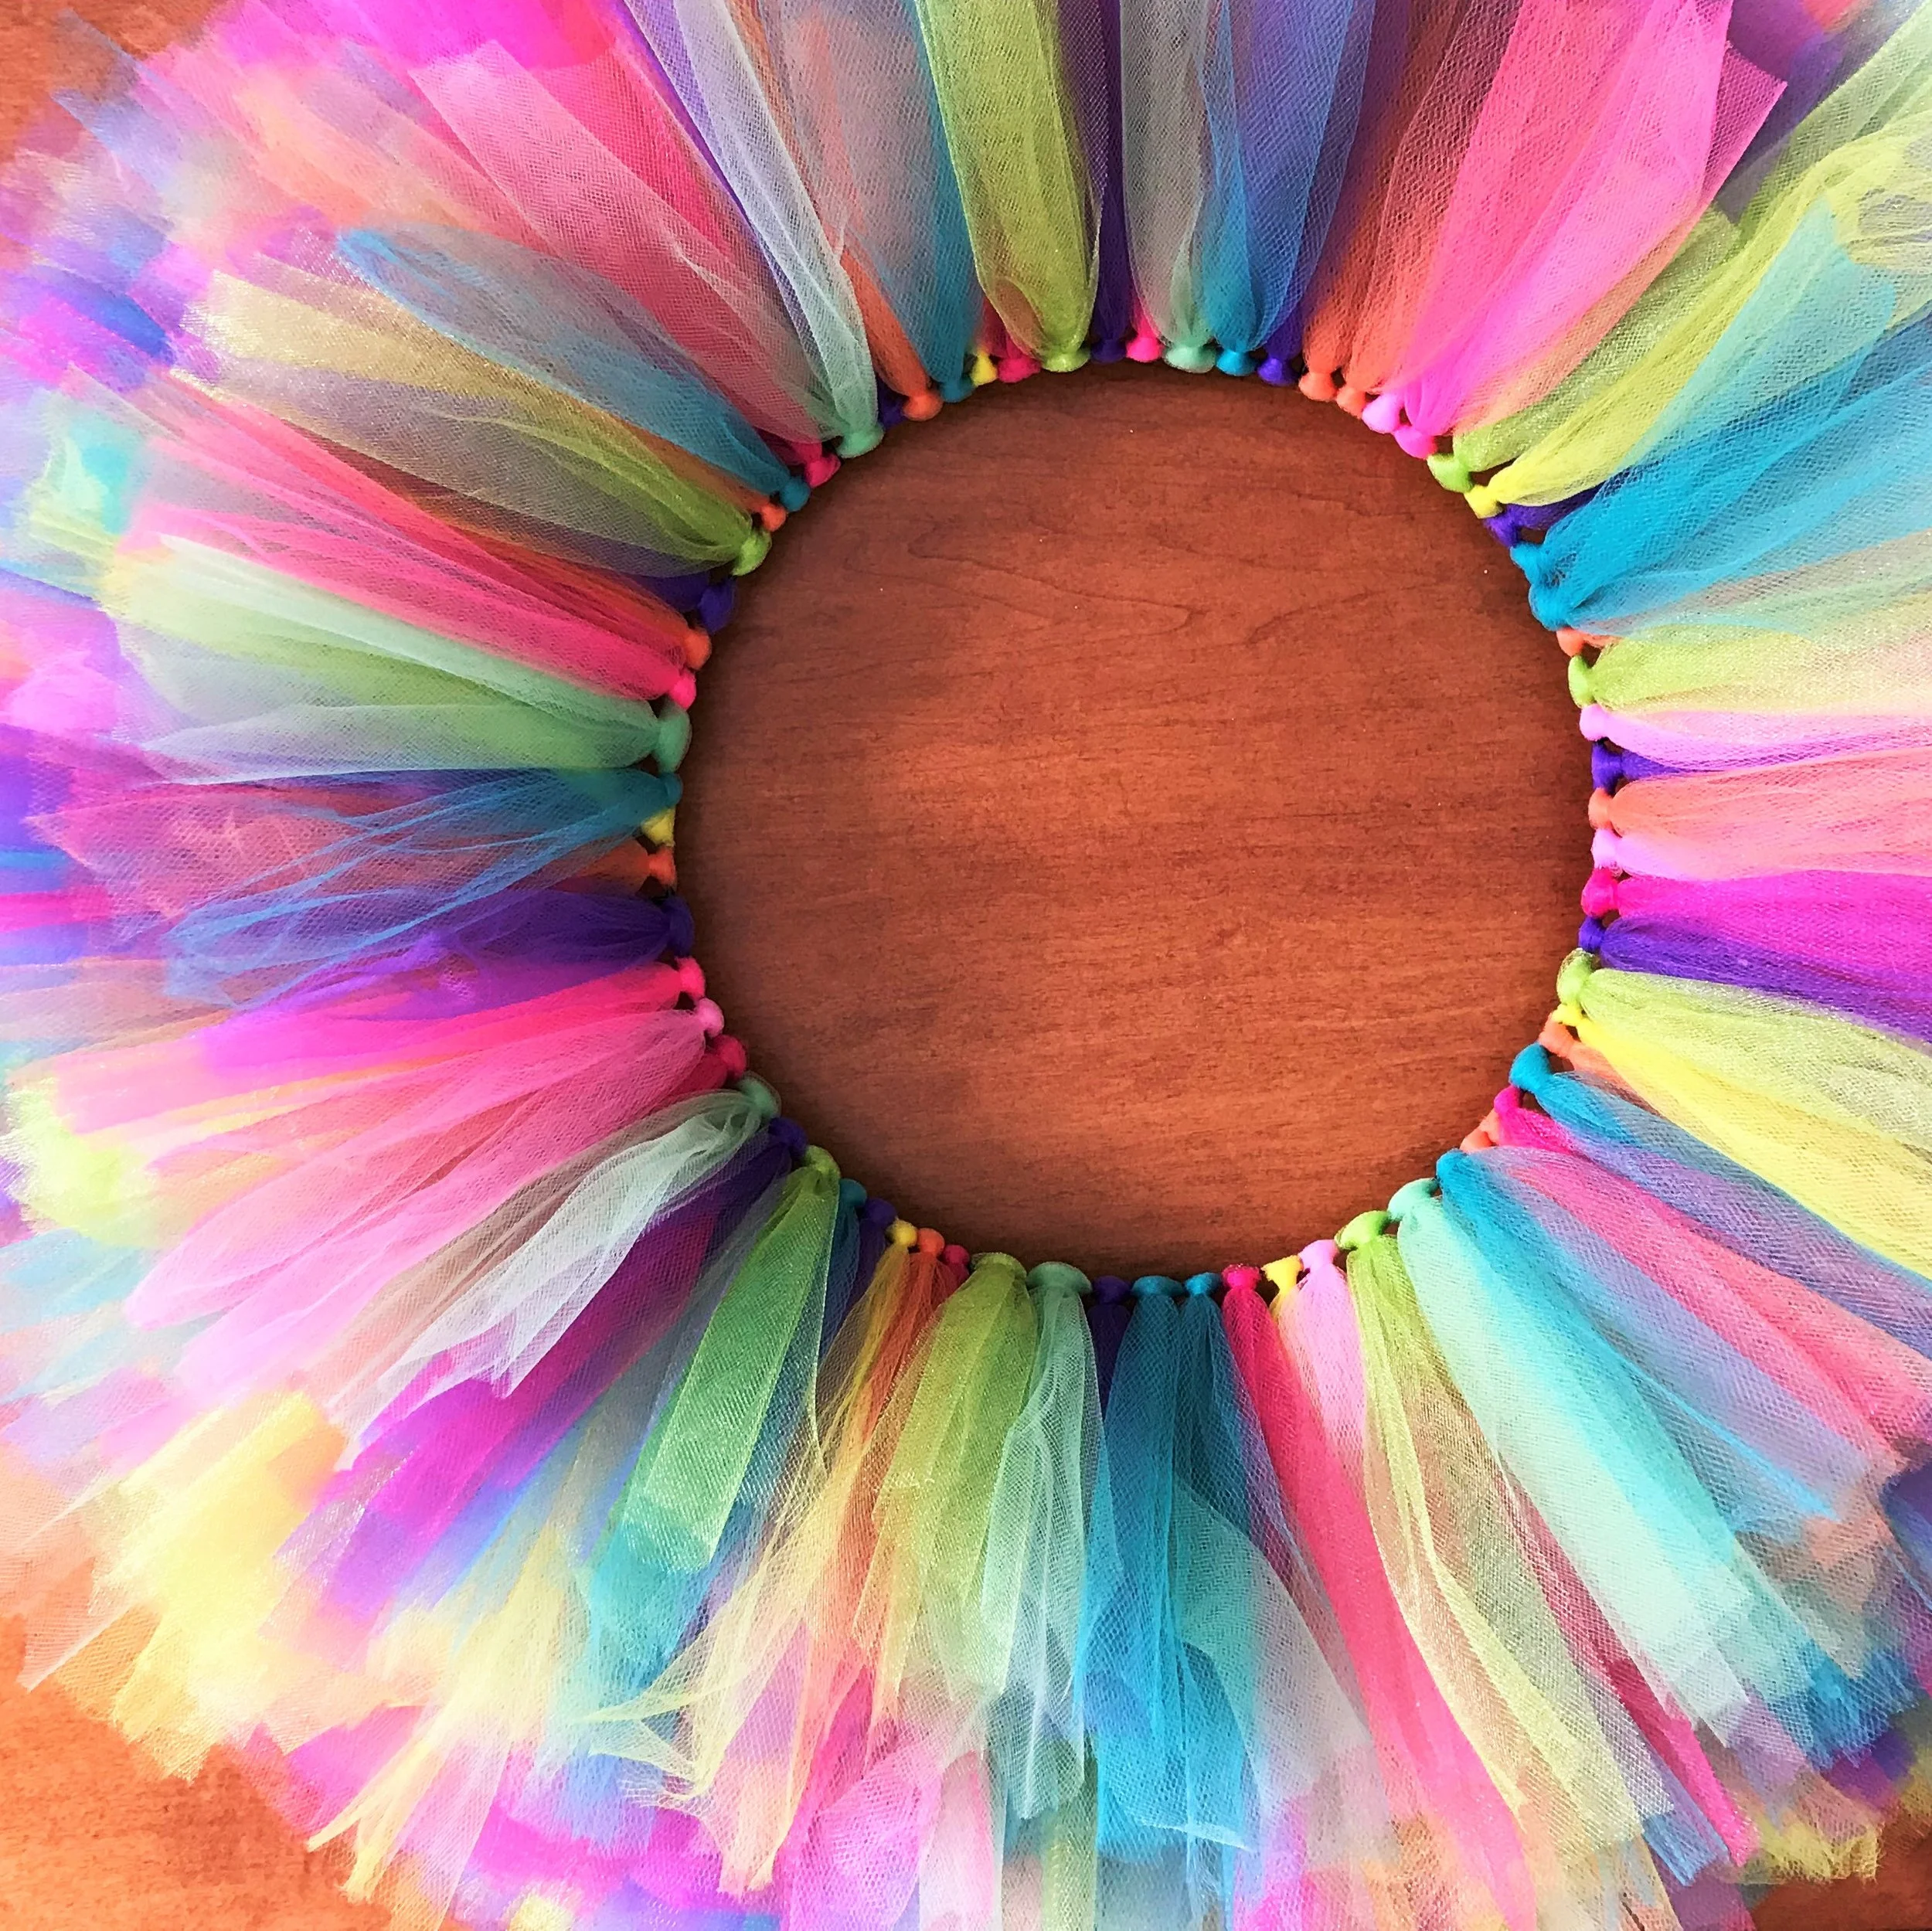
Making a tulle wreath is only as diffcult as picking out the colors you want to work with and the pattern to use them in. Follow these easy steps to make your own masterpiece with ease. For the sake of this tutorial, I am using a rainbow of colors because I plan on hanging my wreath throughout the Summer.


Supplies Needed
(1) 15” Wire Form
(1) 12” Ruler
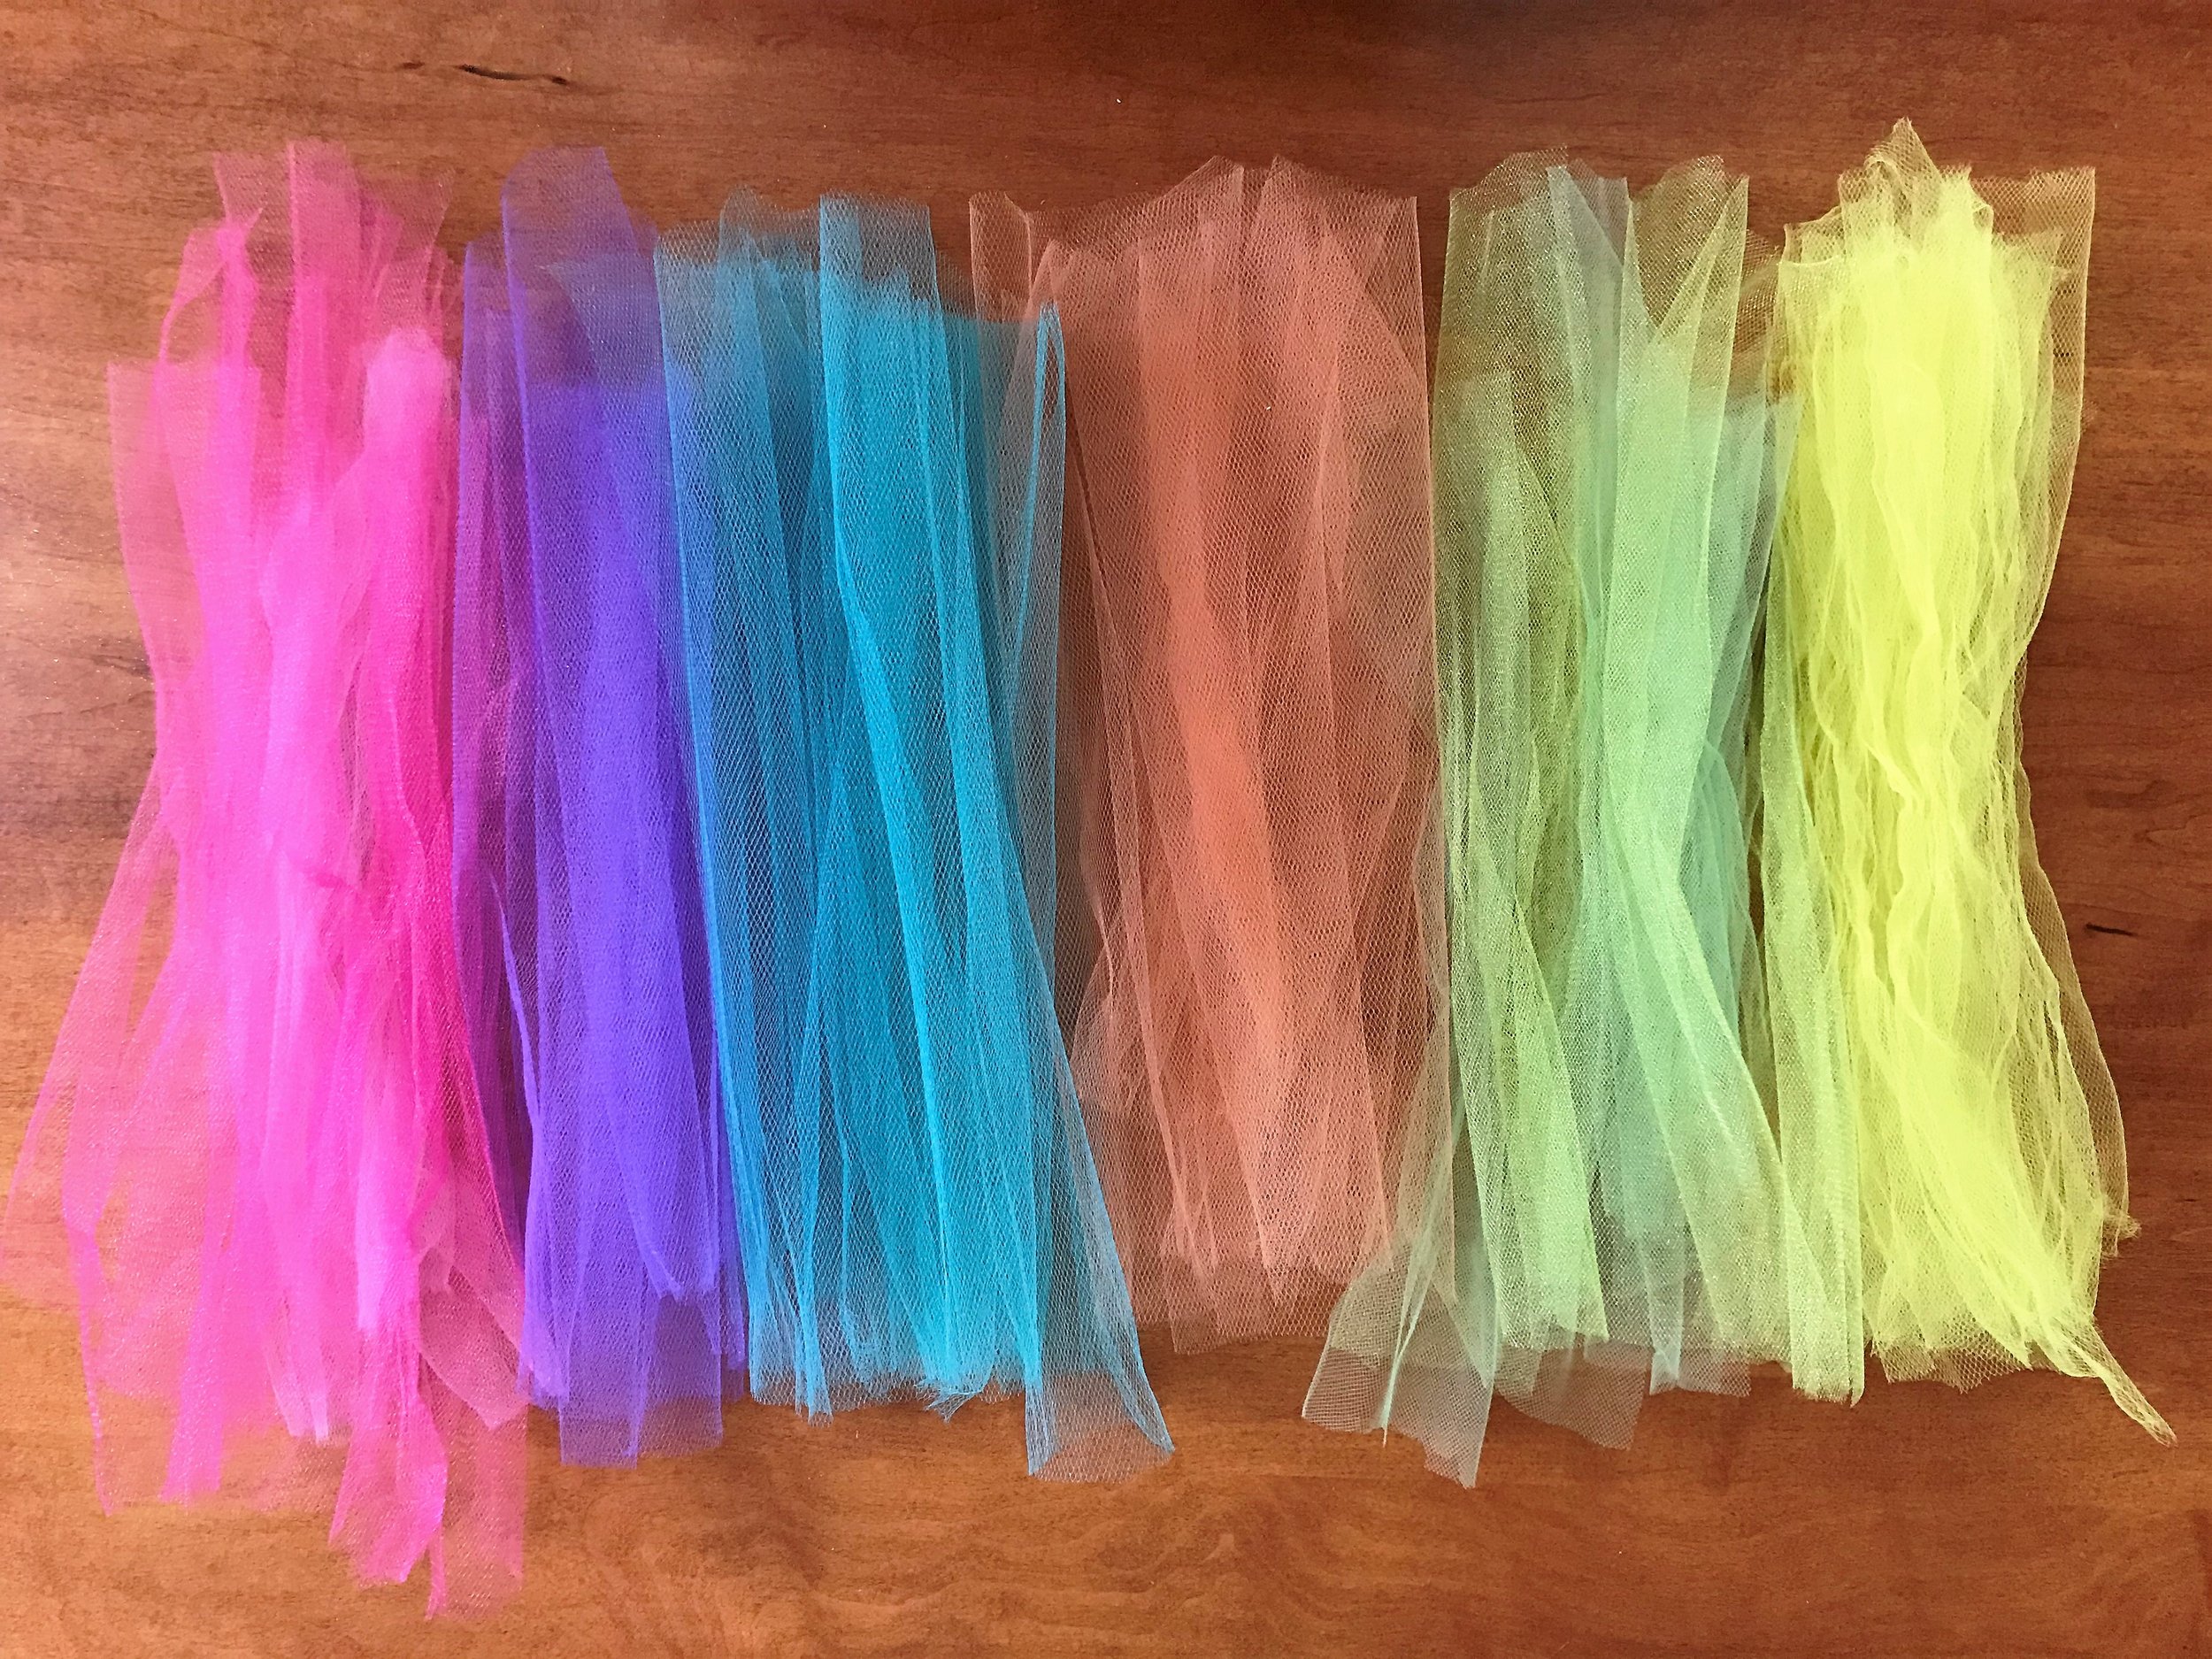
6” Wide tulle(glitter) ribbon, colors as desired (approx. 150 yds used in this tutorial)
Scissors
Decorating Options: Silk flowers, plastic Easter eggs, lettering, etc.
Hot glue for decoration (optional)
I recommend working with the tulle in sections to make it easier to judge if you have enough of the colors that you want to use. Depending on your design, it would not be good if you have to run to the craft store because you ran out of the color(s) you needed!
Step 1 - Cut 12” tulle strands of desired colors.
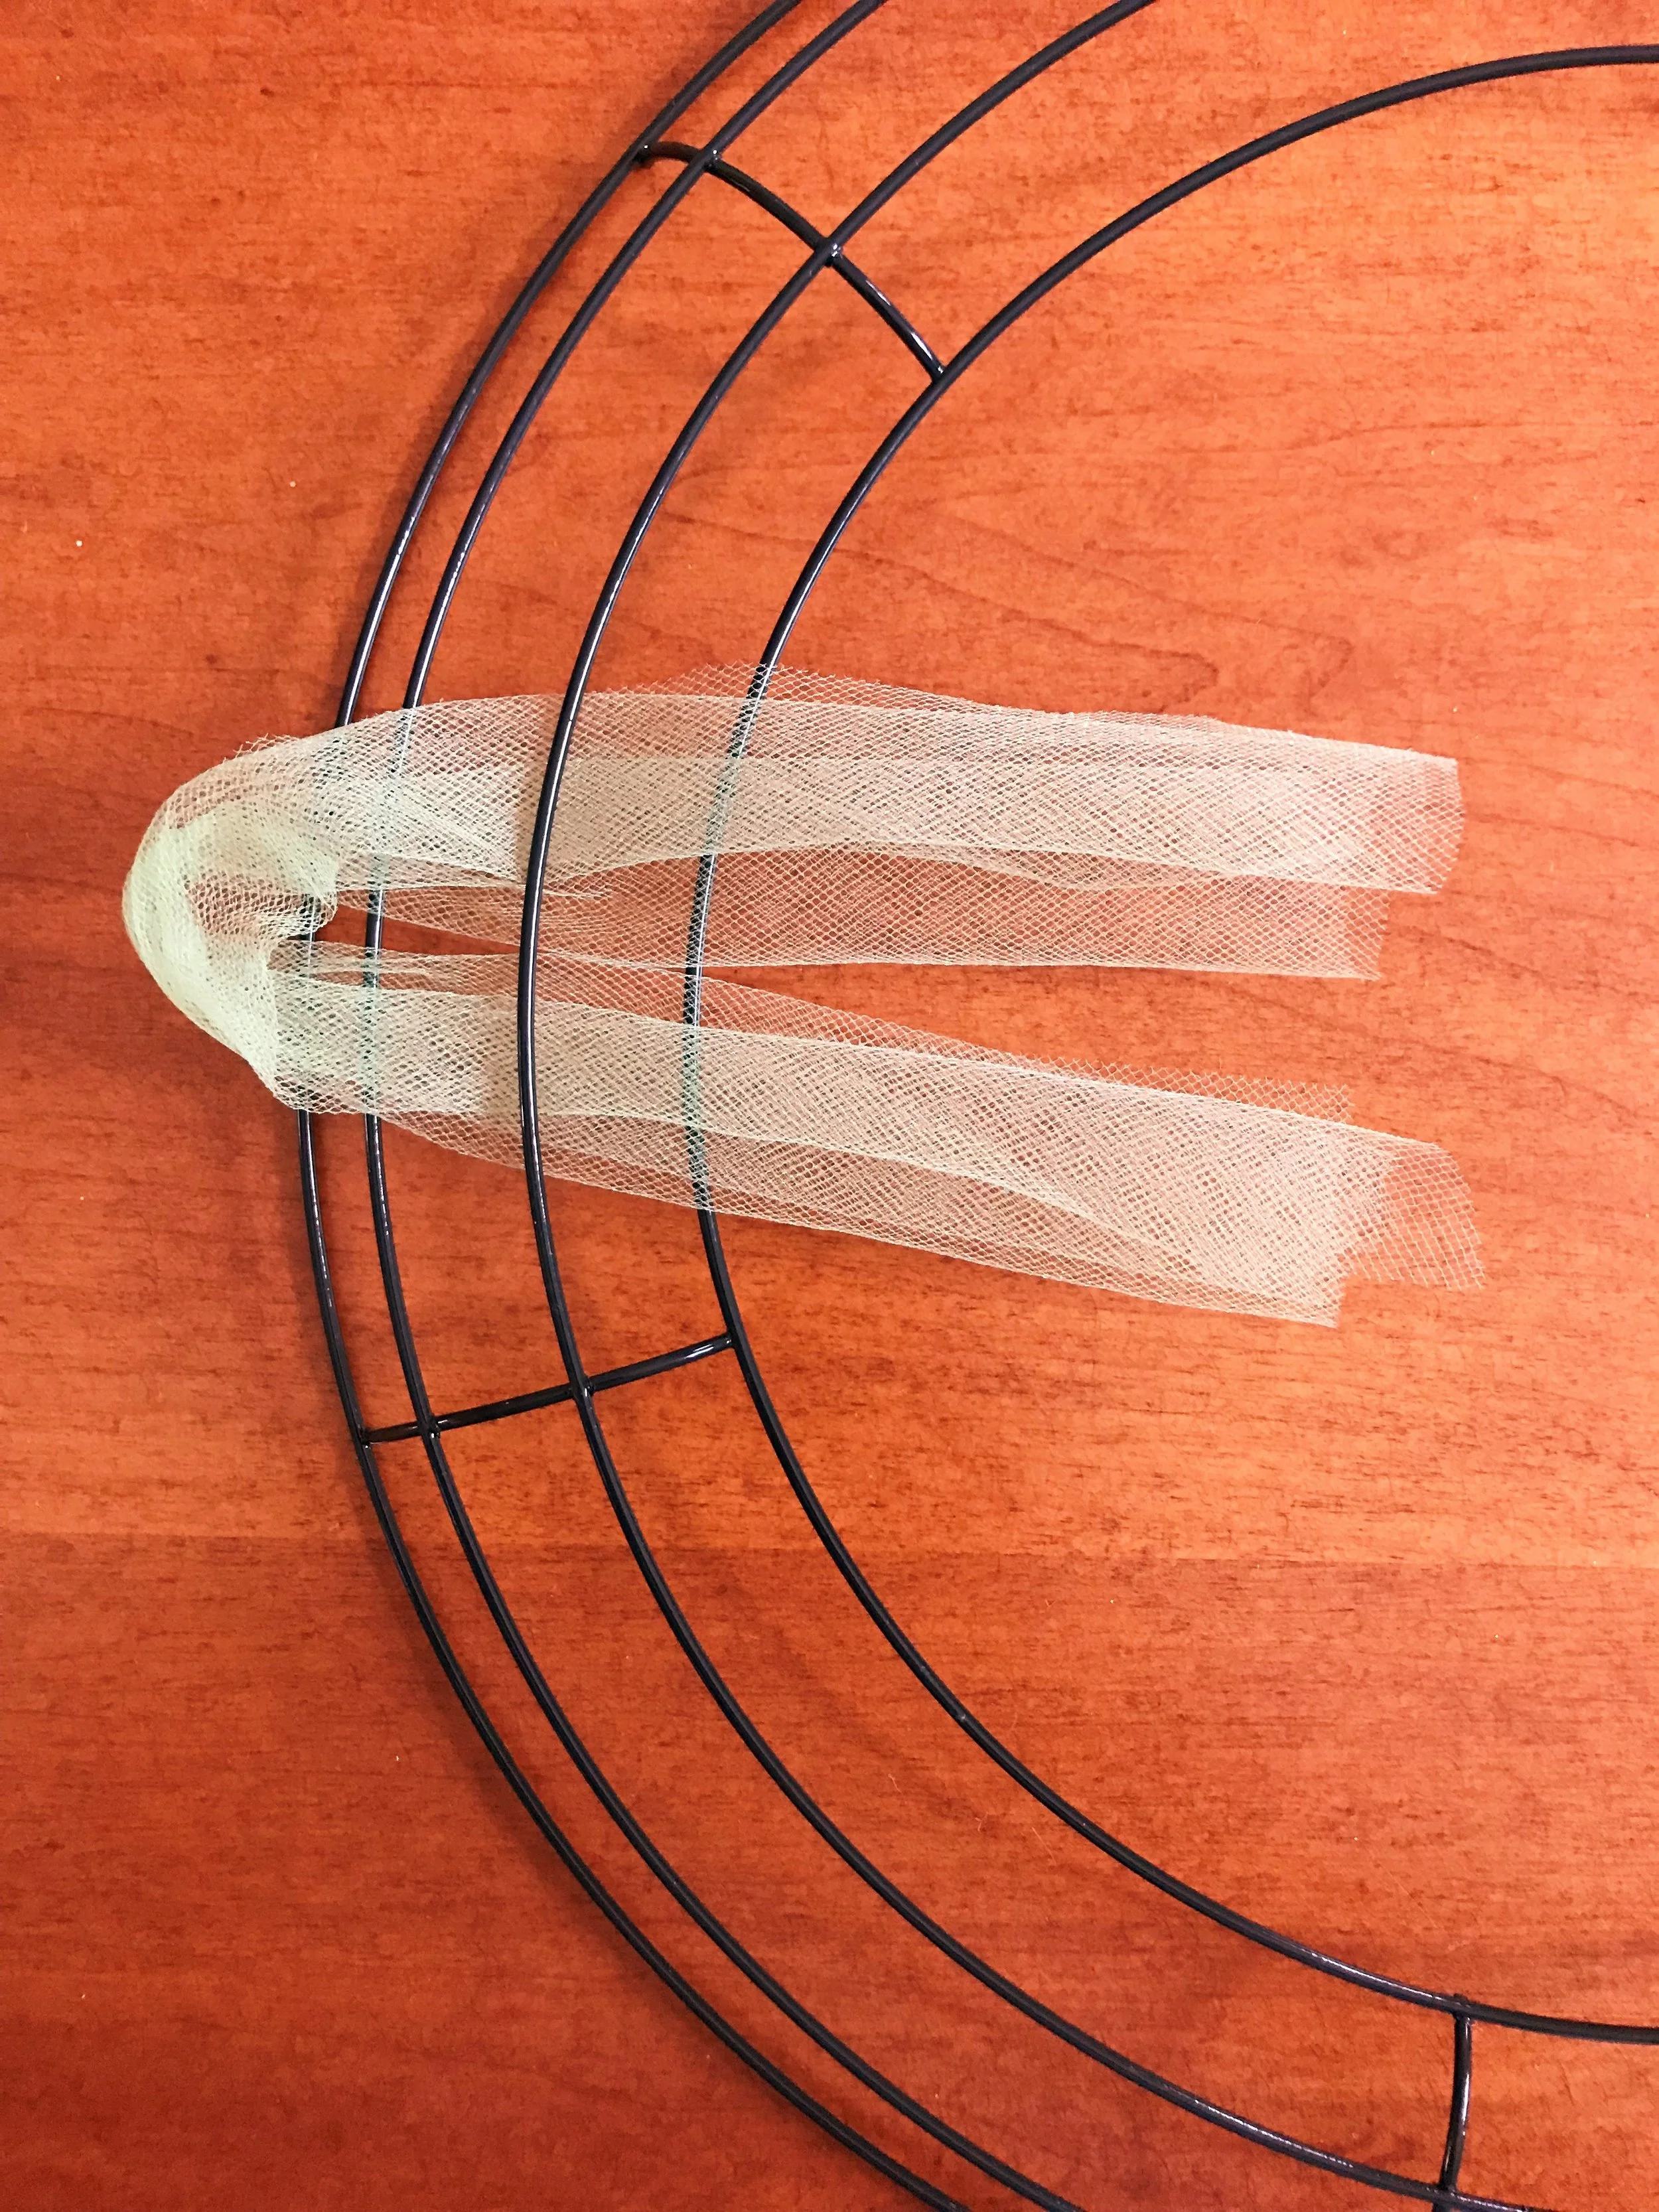
Step 2 - Make a “U” shape with one strand of tulle.
Shop Craftin Nikki for your favorite tulle hair bows and accessories.


Step 3 - Place the inside loop under a wire form section.
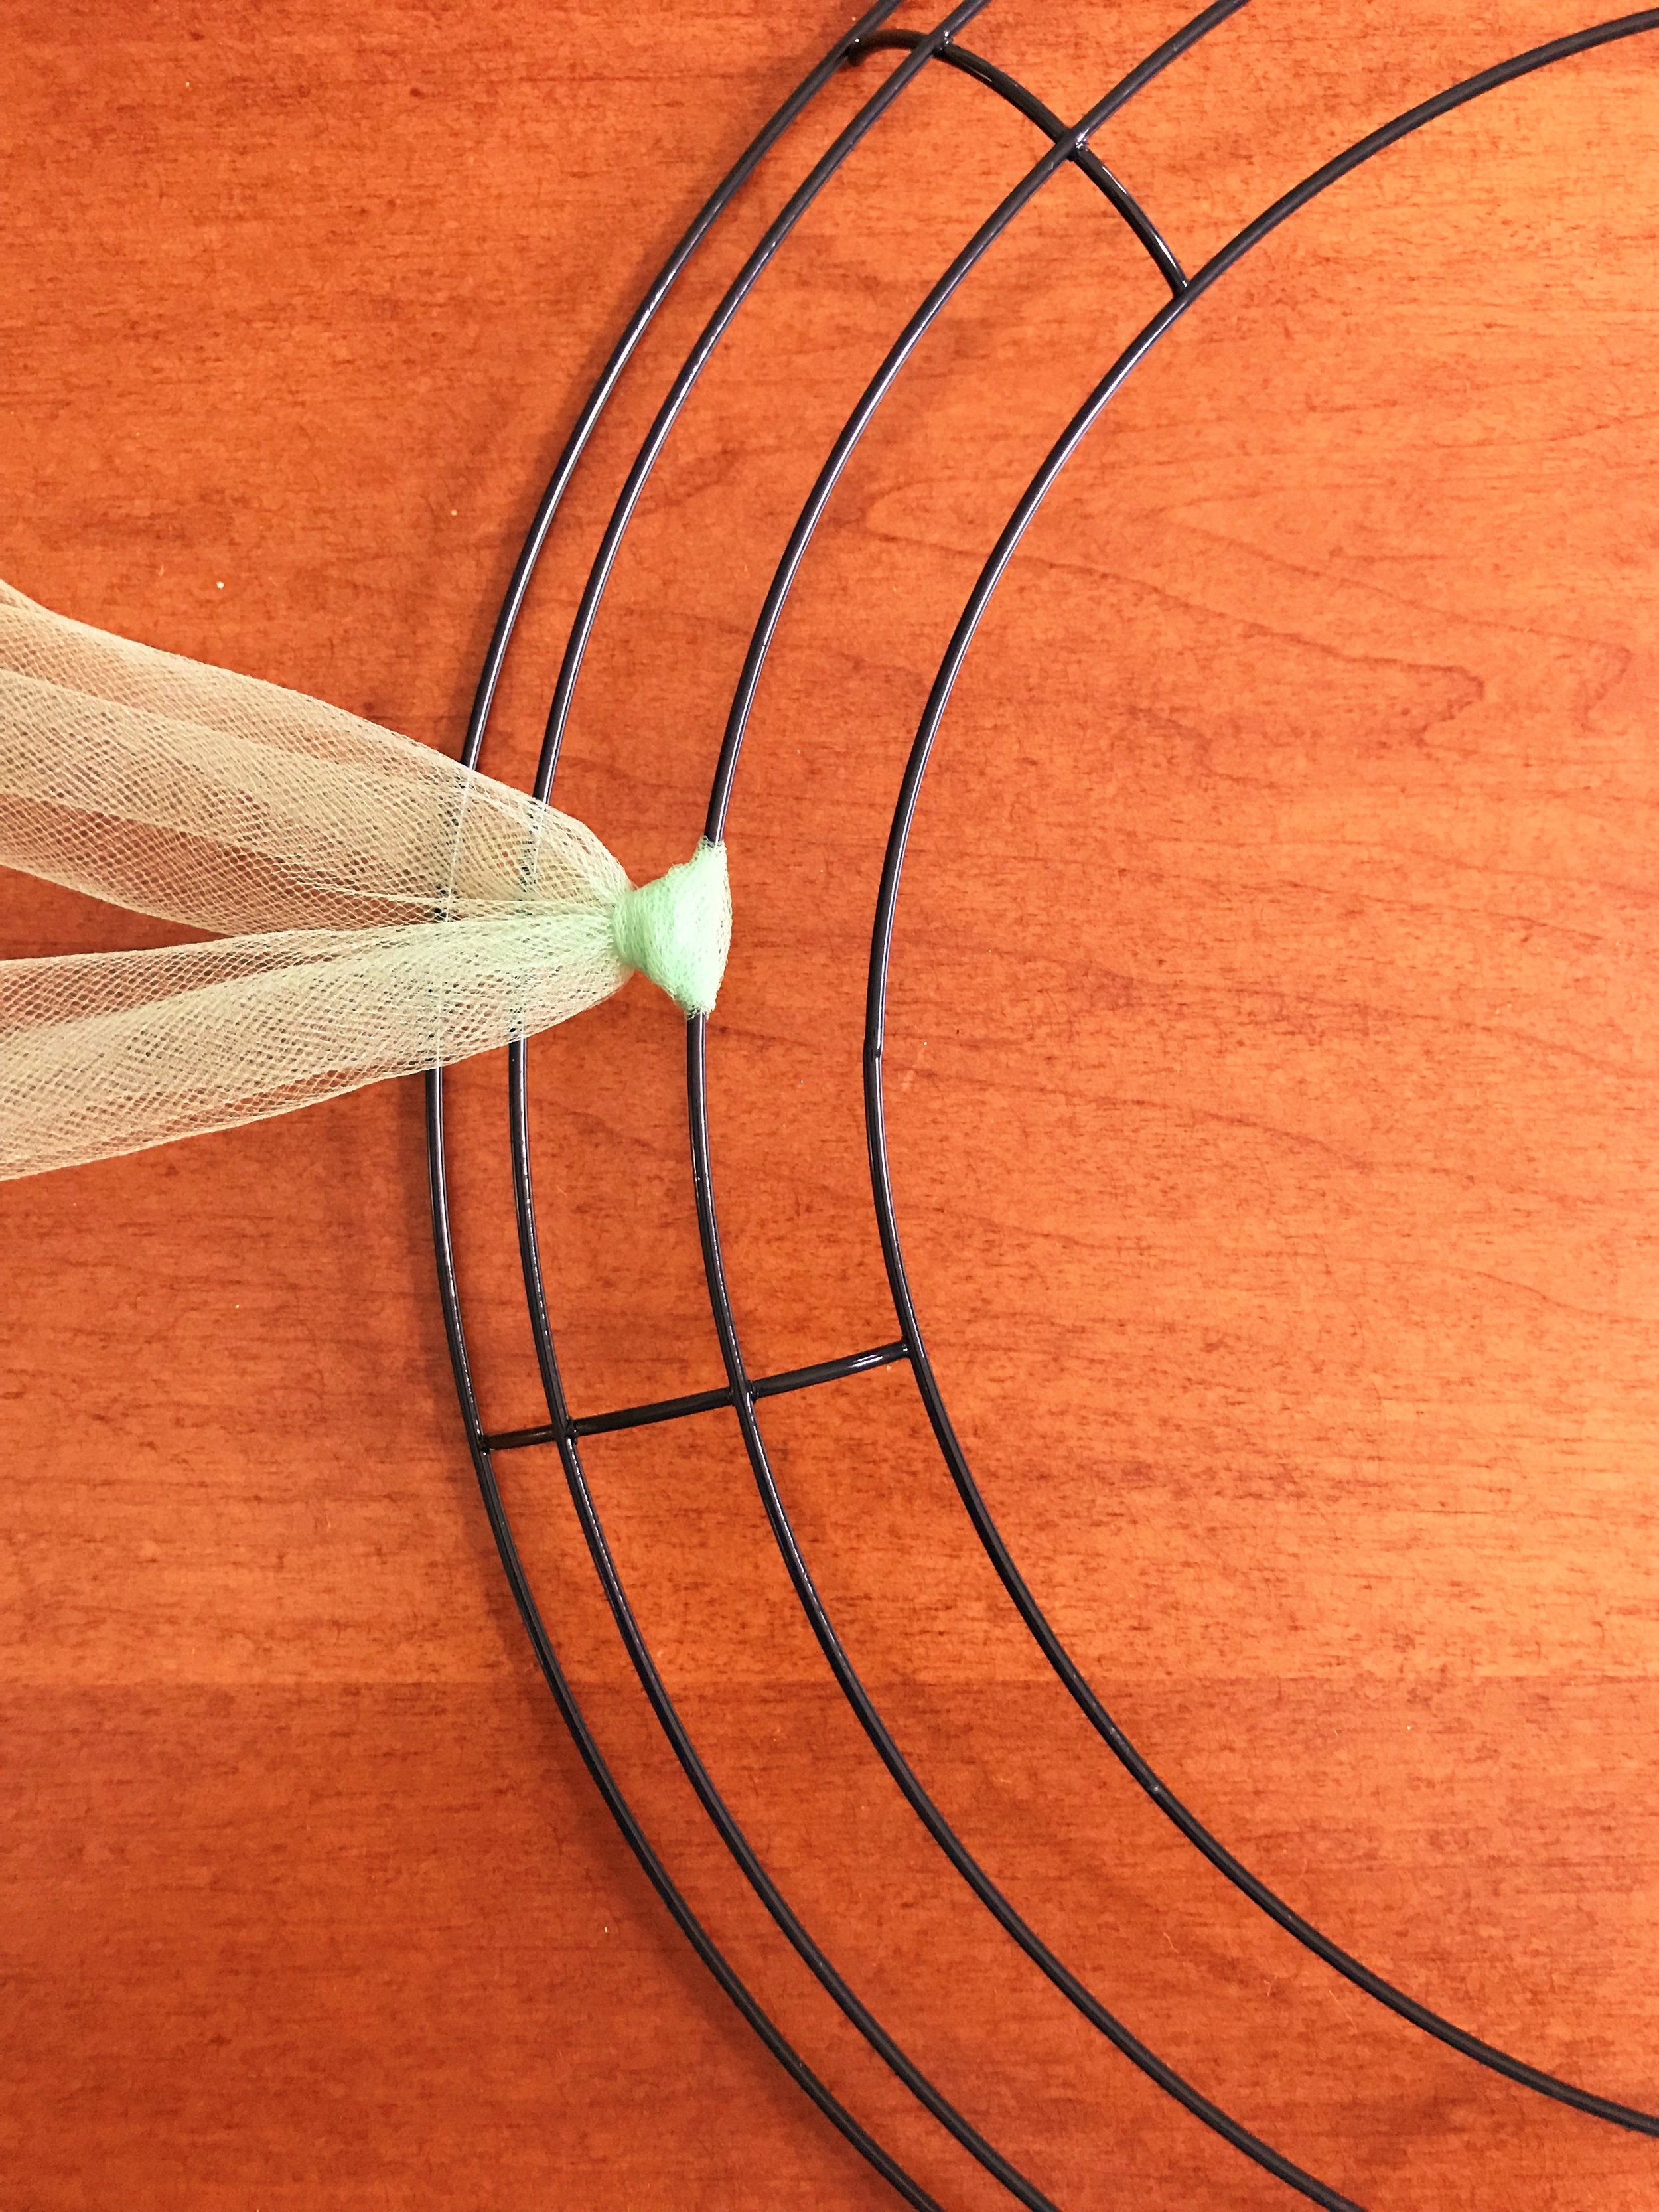
Step 4 - Even out the ends.

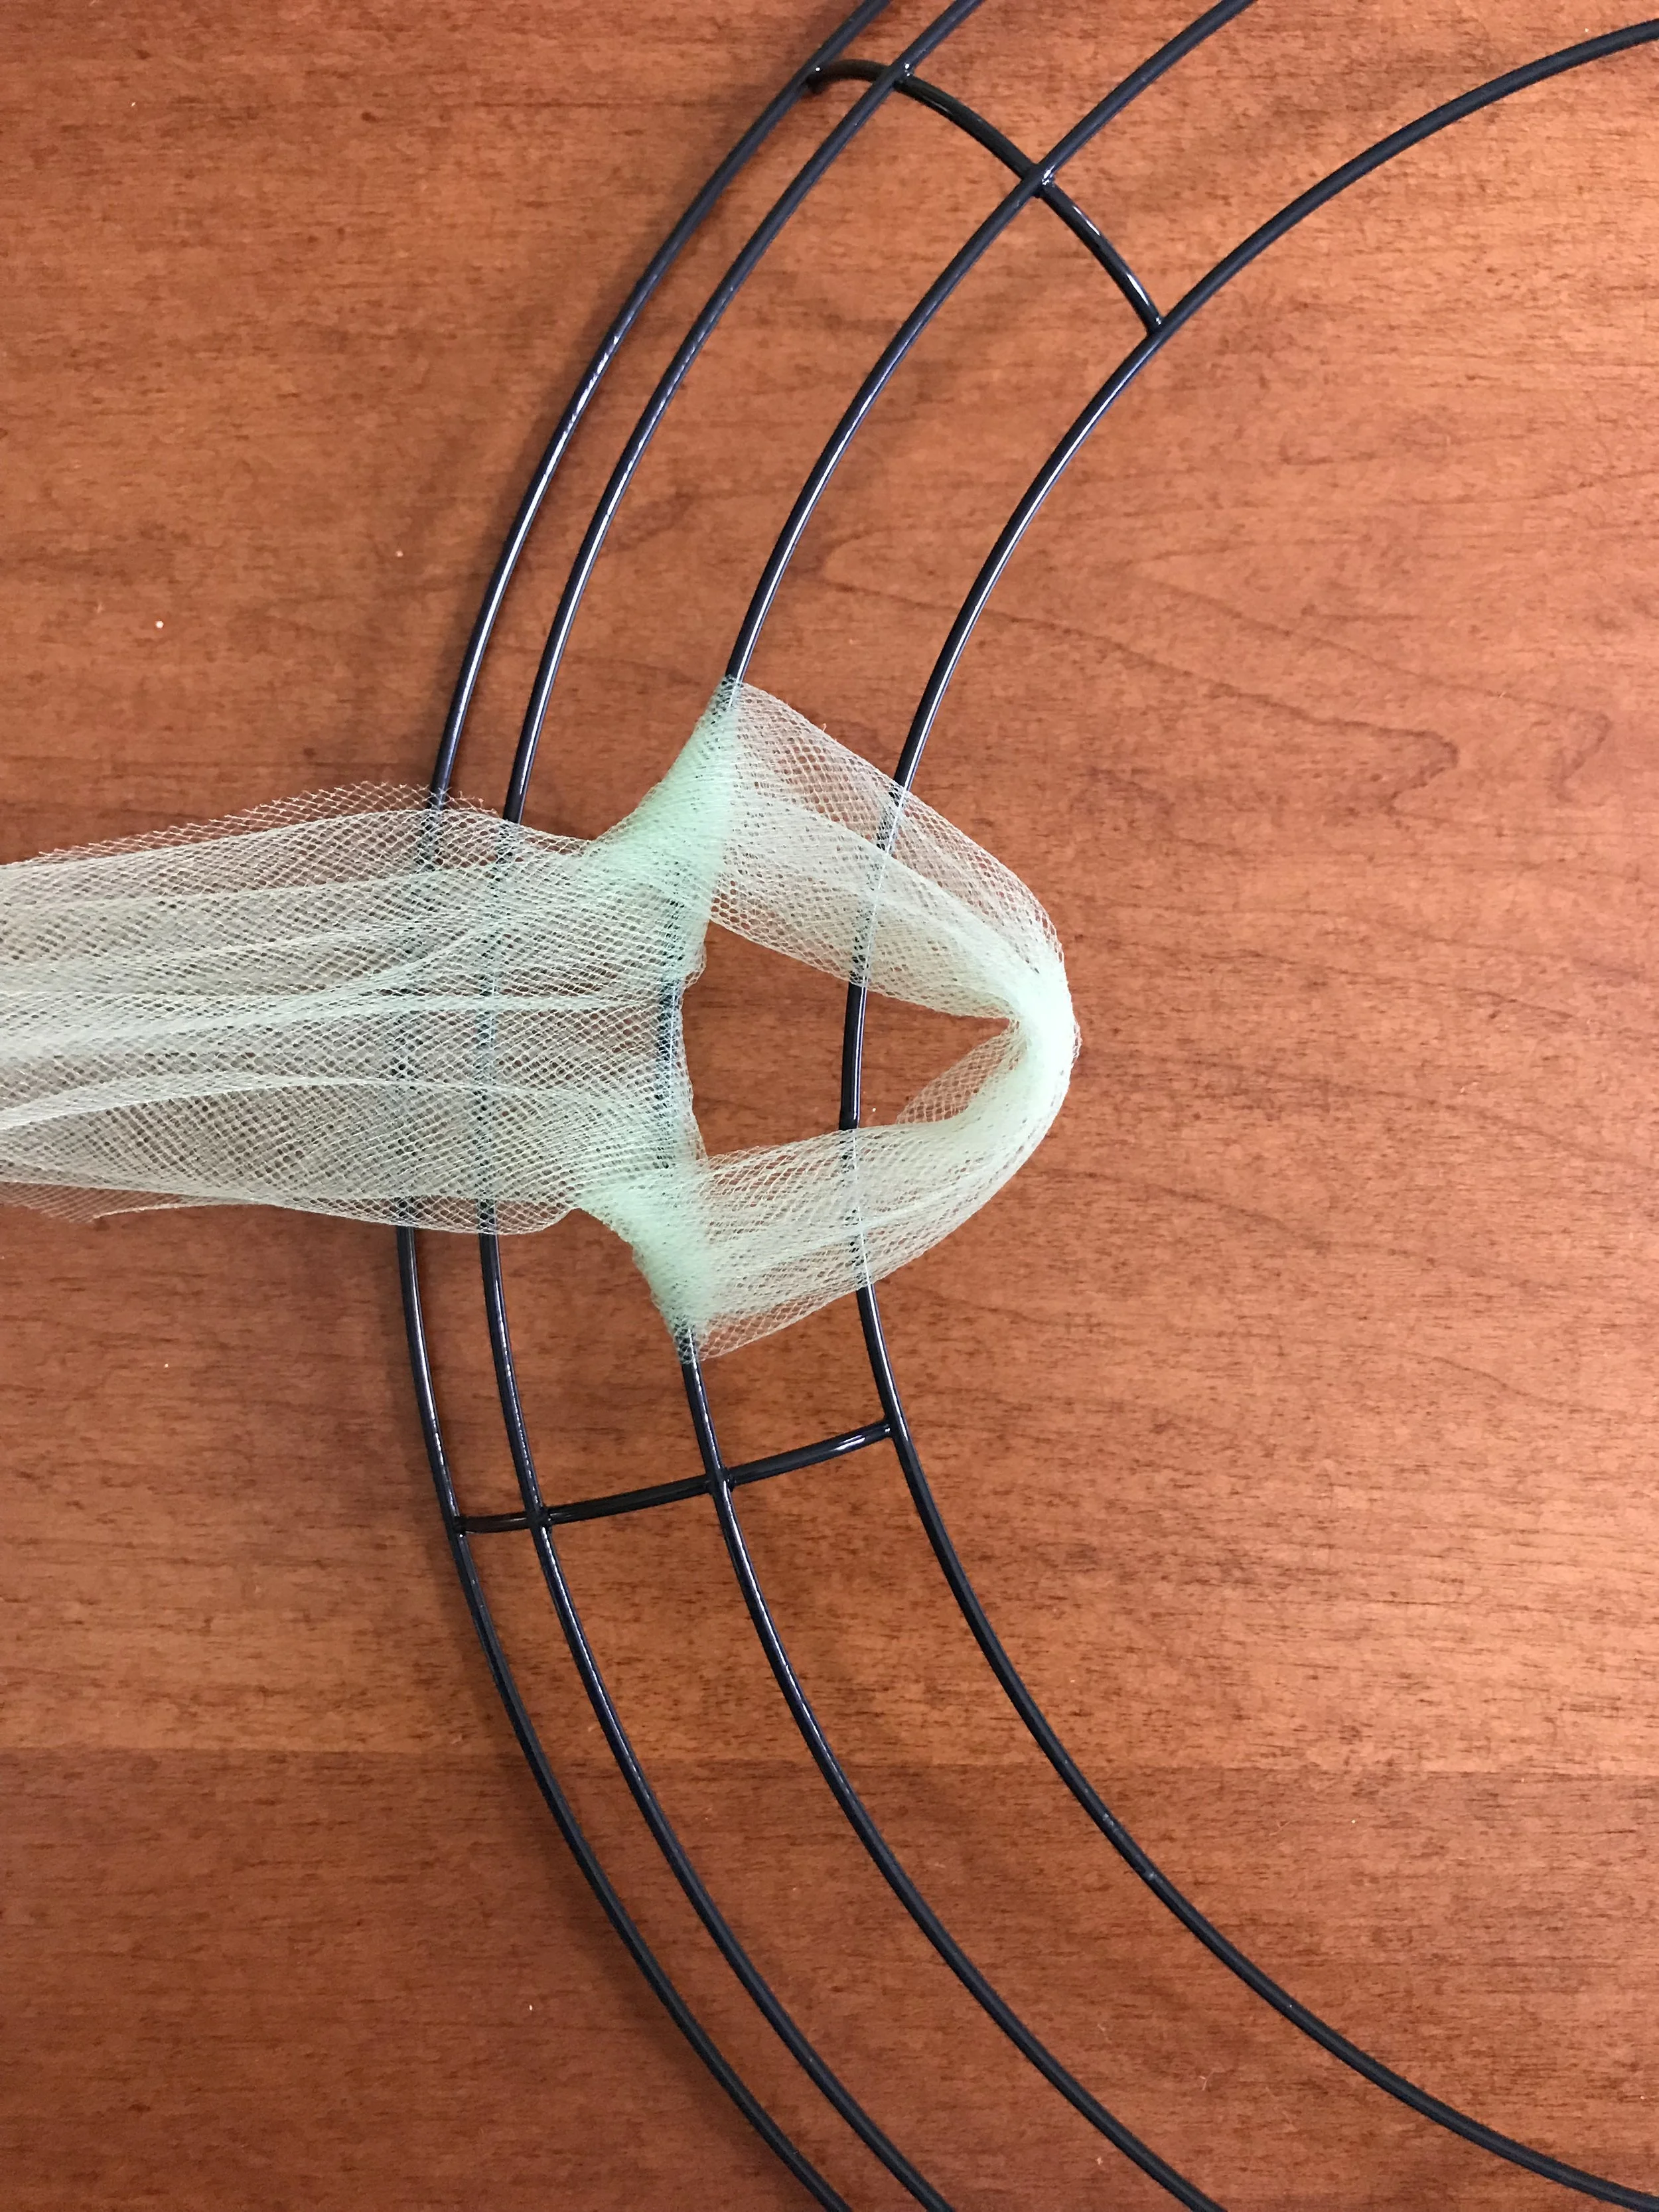
Step 5 - Place the two ends through the loop created.

Step 6 - Pull tulle ends tight to create a knot.
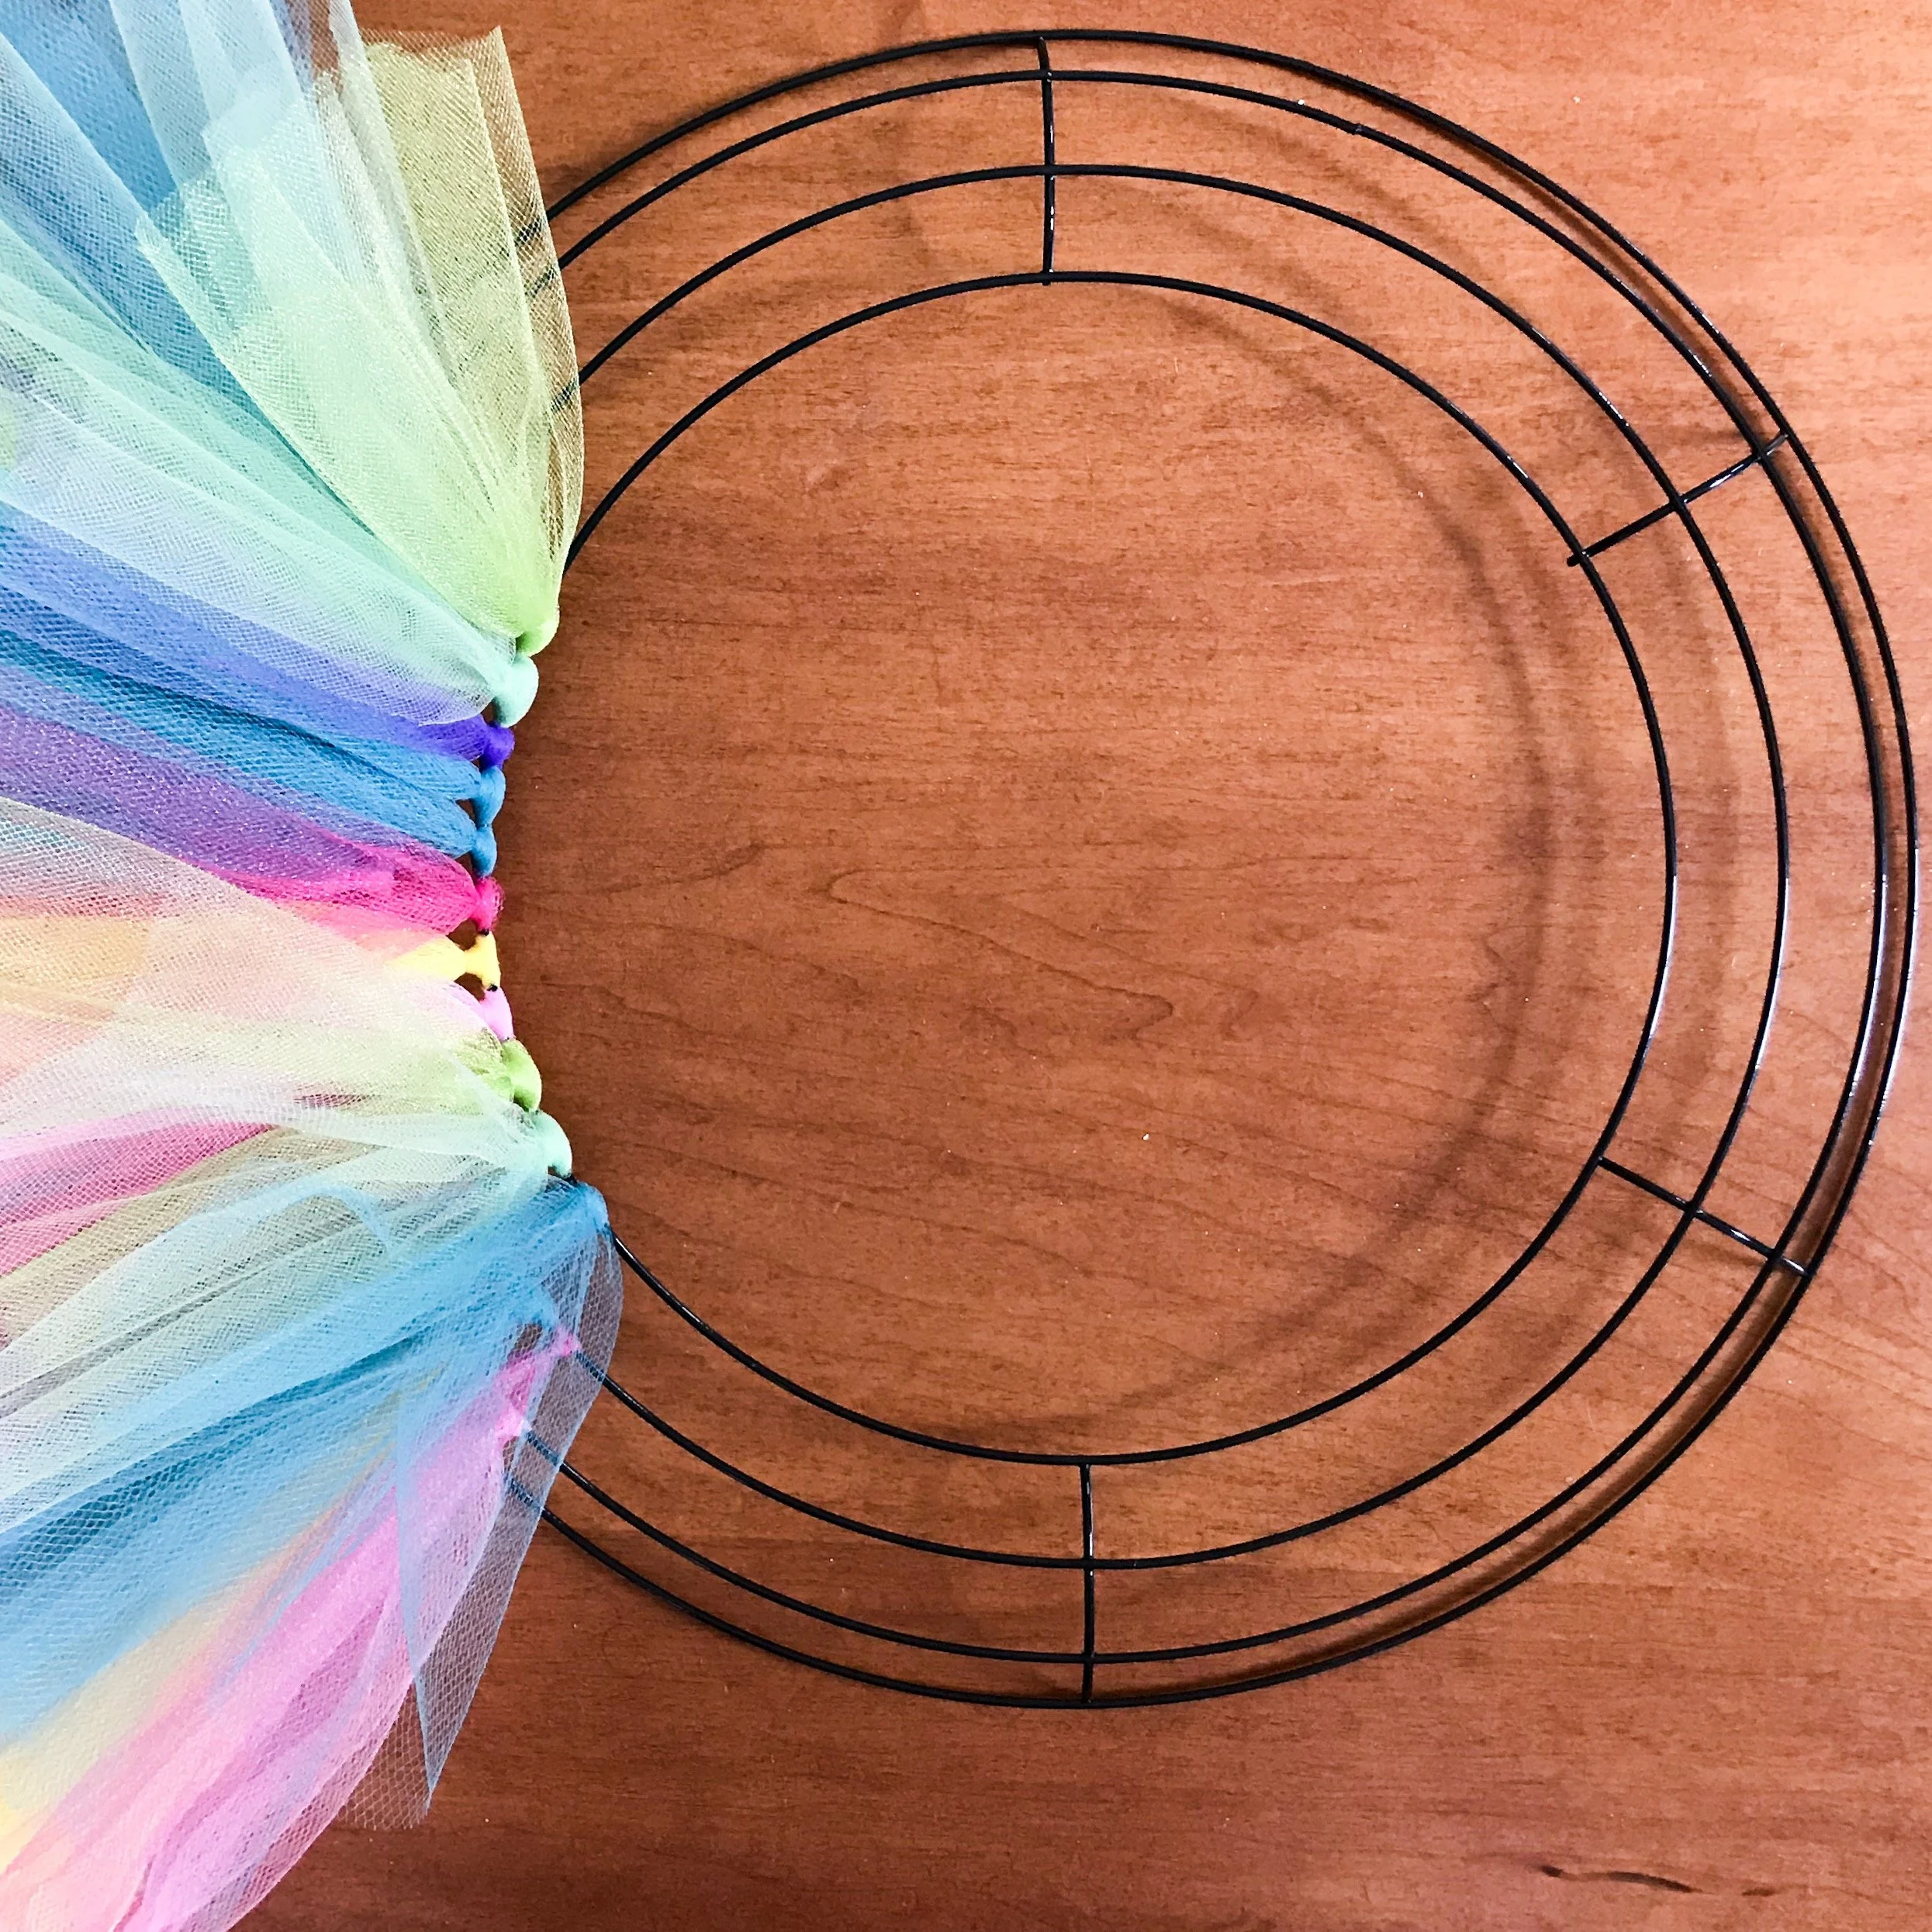
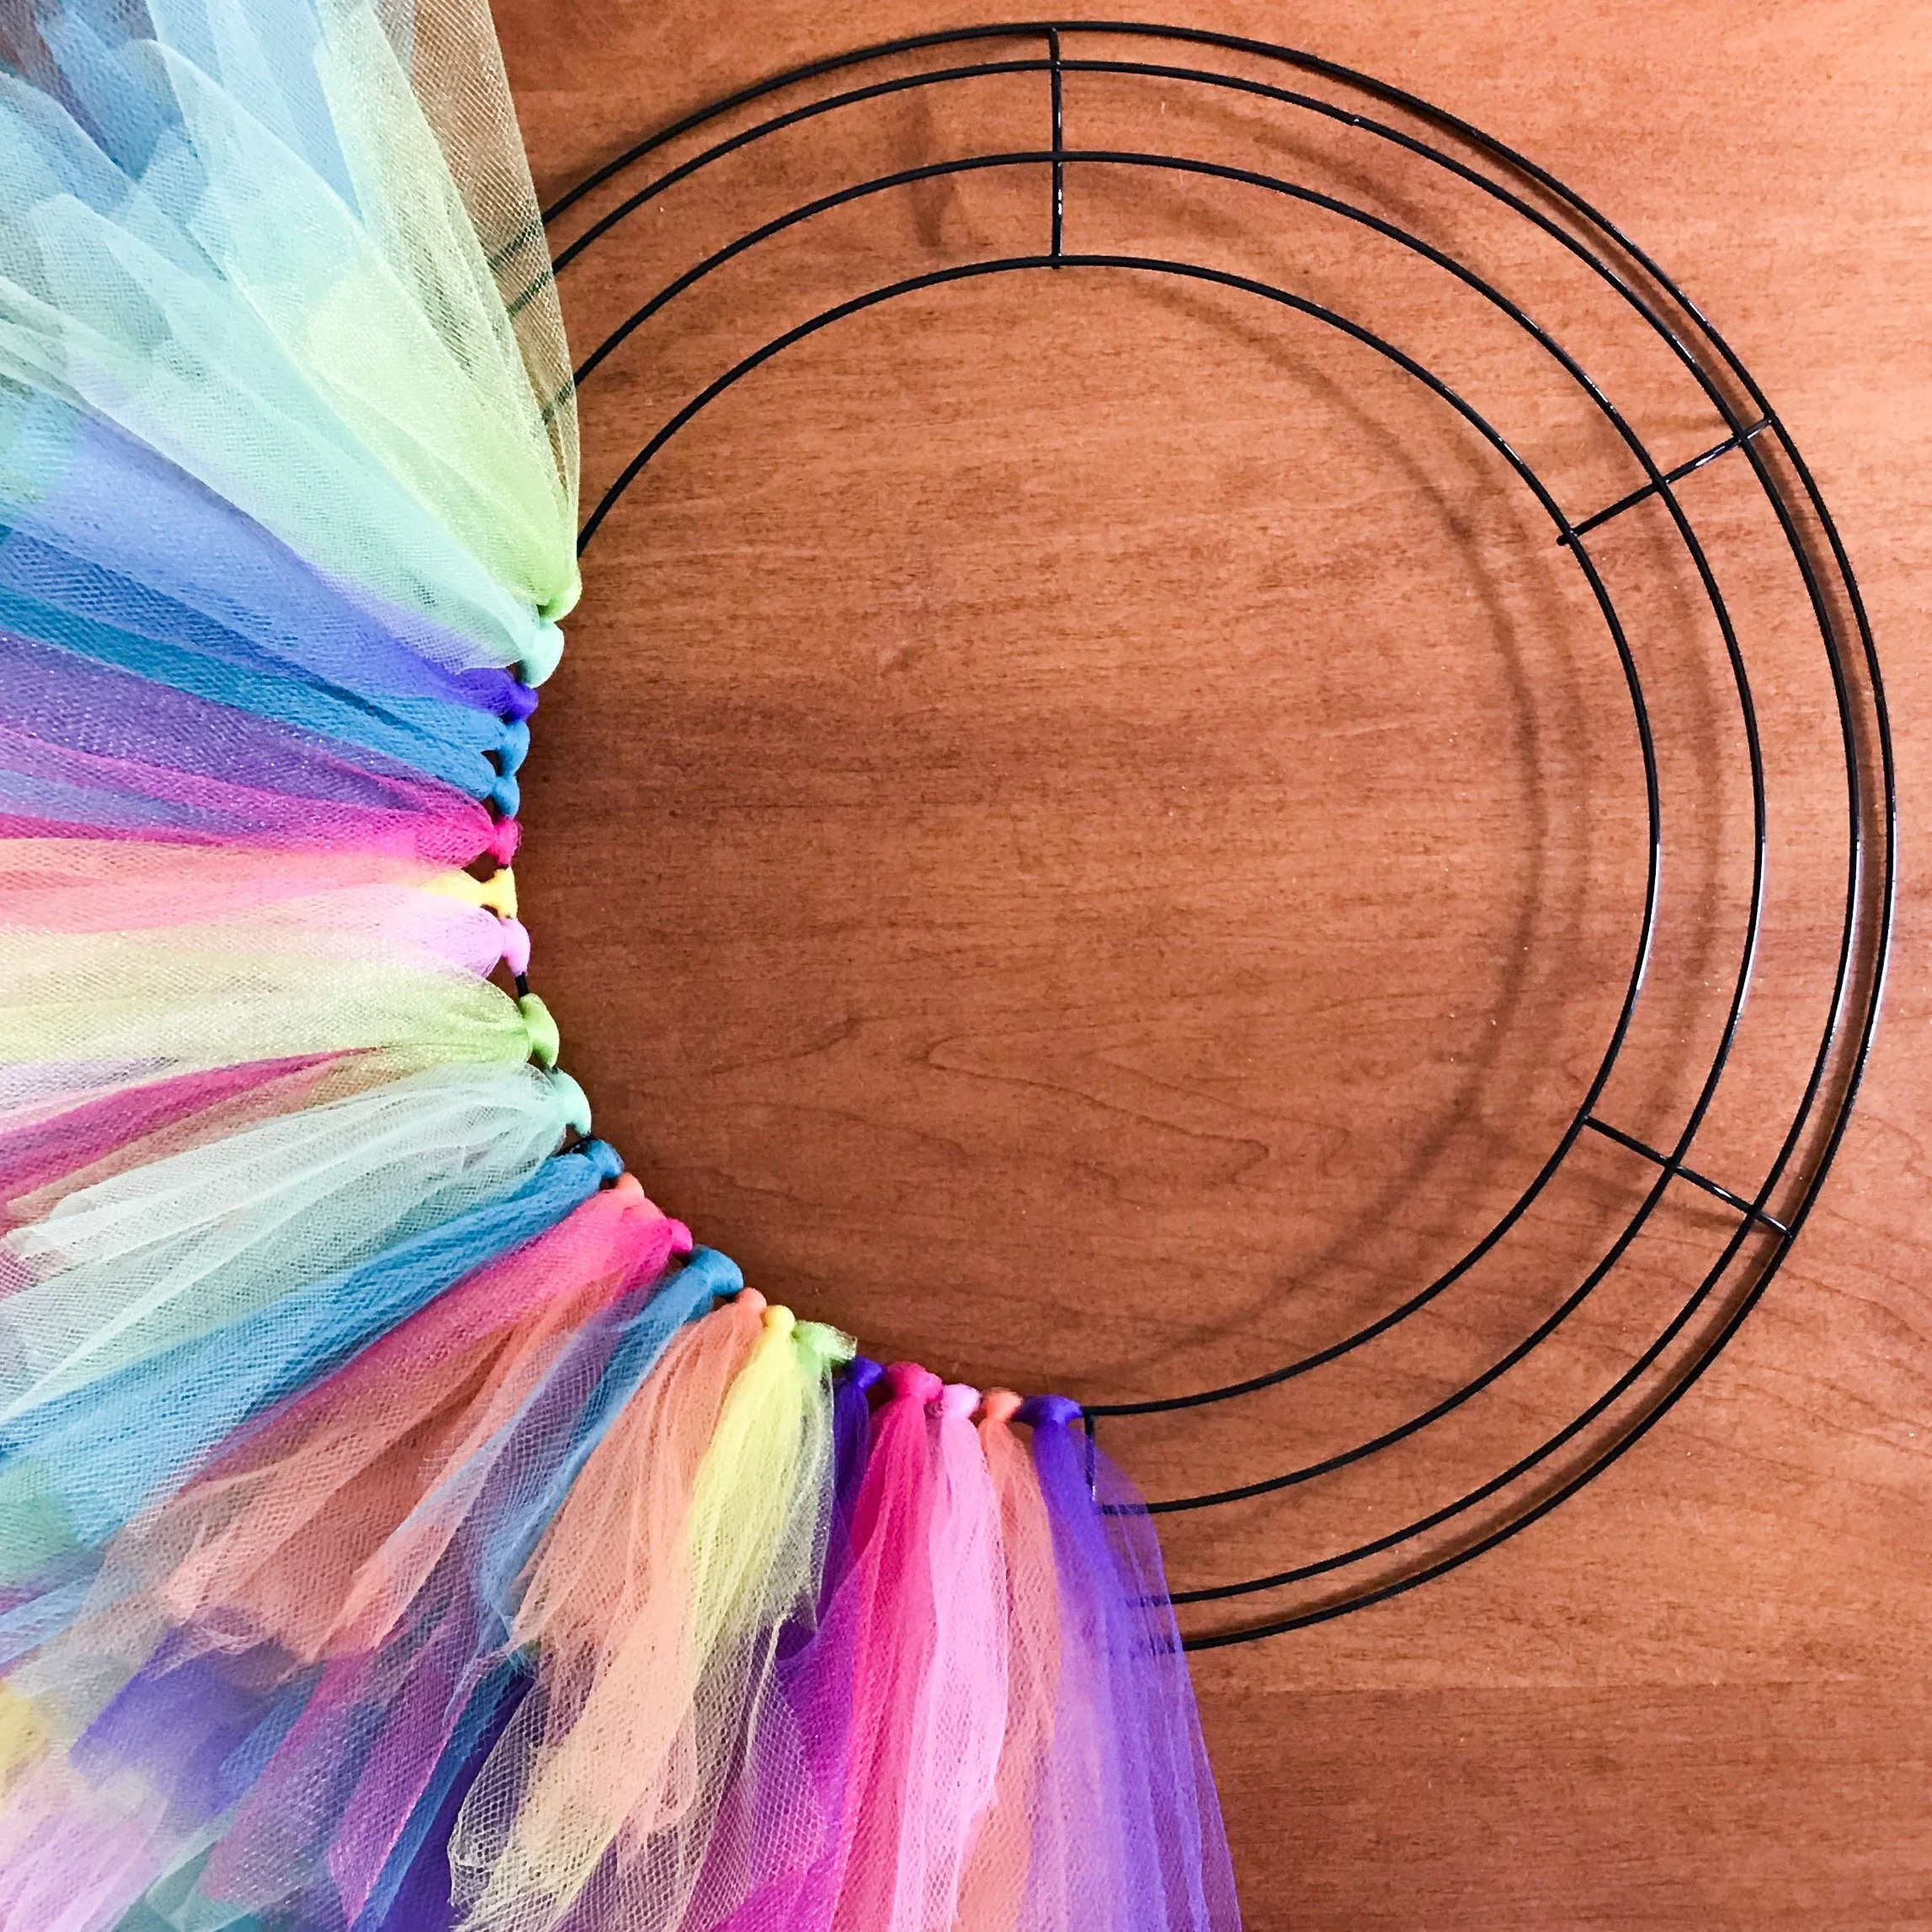
Step 7 - Continue making these knots with tulle all the way around the wire form in each section.


Step 8 - The back should look similar this.

Step 9 - Continue making your way around the circle.

Step 10 - You are Almost there!

Step 11 - The circle is complete.
Hopefully, you now have a complete circle of beautiful tulle and you are ready to hang in your favorite space! They are so versatile because there are endless combinations of colors and ways to accessorize.
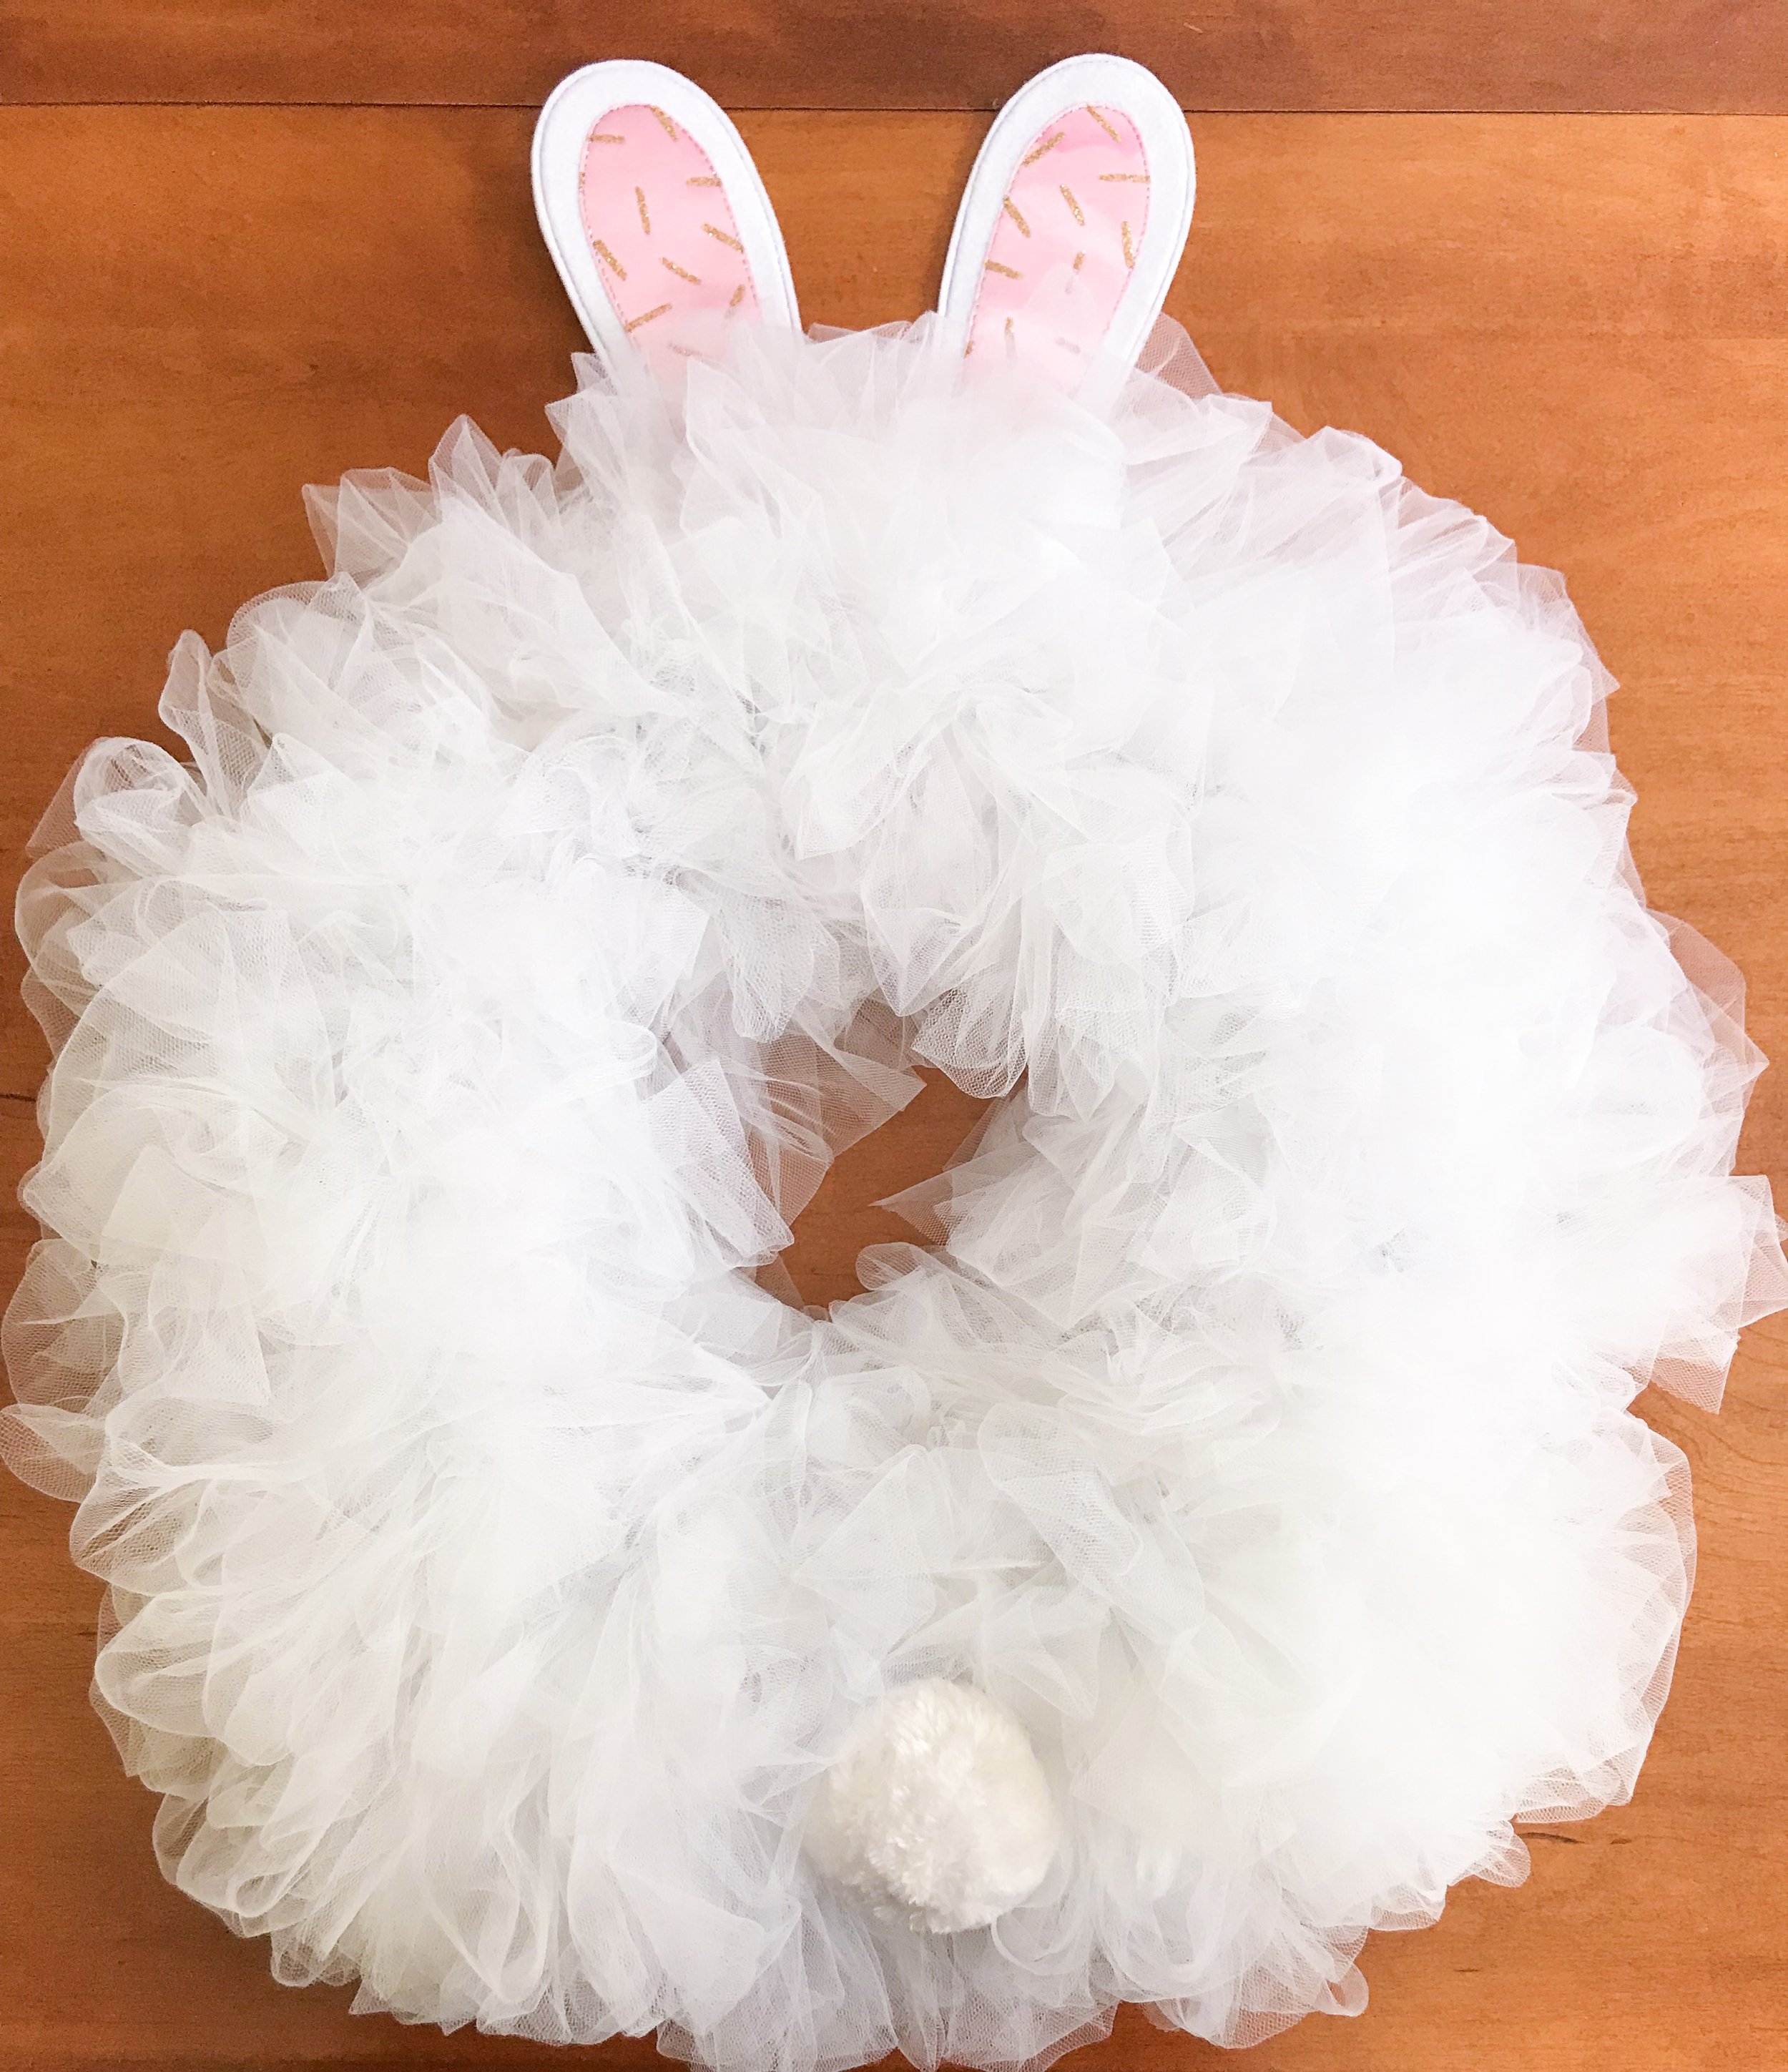
Step 12 - (Optional) Accessorize
All color combinations and styles can change up the look of your tulle wreath for season or event. Shown below are a couple perfect wreaths for Spring. Who doesn’t appreciate a beautiful rainbow? And turn your tulle into a cute little bunny by just adding some ears and a tail for that perfect photo prop!


Now that you have made your first tulle wreath, how many more do you plan on creating? There are endless possibilities of fun with design! Share your creations on Facebook and Instagram by tagging us with craftinnikki.
Thanks for creating with me and stop back for more help tips tips and fun tutorials!
Pin your favorite Craftin With Nikki Blog Post!